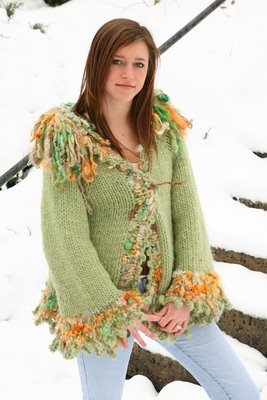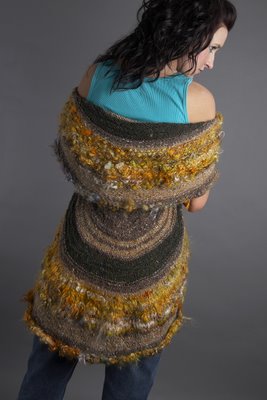
This simple top-down raglan style design suits all ages. Be Creative! Have fun with color!
For approximate measurements and yarn requirements, please refer to sizing chart at end of pattern.
Size: Child Sizes: 2 (4,6,8,10); Adult Sizes: 4 (6,8,10,12,14,16,18,20)
Yarns: Yarn by Ozark Handspun - 34 yds; Bulk Weight yarn to obtain gauge such as: Bear Creek by Kraemer Yarns; Burly Spun by Brown Sheep; or Magnum by Cascade Yarns
MATERIALS:
1 set US size 17--24 inch or longer circular knitting needles
1 set US size 17--16 inch circular knitting needles for sleeves if worked in the round
1 US size J or K crochet hook
Stitch Markers and Stitch Holders
3--8 Odd Ball Buttons measuring between 5/8 and 1 1/4 inches
Gauge: 2 stitches per inch on size 17 needle or size to obtain gauge
Techniques you will use in this pattern and additional pattern notes: Garment is raglan style worked top down, back and forth in stst (knit 1 row, purl 1 row) throughout on a circular needle.
Crochet Picot Edge=*2 sc, ch 3, sl st in 1st ch; repeat from * to end.
Increase=M1L&M1R or you can use any increase method you want.
Knit Picot Bind Off=BO 2 sts, *slip st back from right hand needle to left hand needle, use cable cast on method, cast on 3 sts, then BO 5 sts; repeat from * to end of row. BO last st.
Loop Stitch Row=*K1, leaving stitch on left needle; bring yarn to front between needles; wrap around left thumb; move yarn to back between needles; knit the stitch again; slip stitch from left needle to right needle; lift 2nd stitch on right needle over last stitch worked as if to BO. Repeat from * across row.
Garment can easily be altered: garment length, degree of the swing, sleeve width and length or use of yarn throughout.
Abbreviations: BO=bind off; Ch=chain; CO=cast on; K=knit; K2tog=knit 2 together; MC=main color; M1L=make one left; M1R=make one right; pm=place marker; P=purl; rm=remove marker; sc=single crochet; st st=slip stitch; sm=slip marker; SSK=slip slip knit; st(s)=stitch(es); stst=stockinette stitch
INSTRUCTIONS:
To begin: Refer to sizing chart for number of CO sts.
For Size:__ CO __ sts. Do not join in the round.
Set Up Row (RS): Refer to sizing chart for number of back & sleeve sts. K1, pm, K1 (seam st), pm, K____ (sleeve sts), pm, K1 (seam st), pm, K_____ (back sts), pm, k1 (seam st), pm, K_____ (sleeve sts), pm, K1 (seam st), pm, K1. Turn and work one purl row. (WS)
Yoke: Working back and forth in stst, inc 8 sts on each RS row using the Yoke Increase until armhole measures from neckline to underarm or to desired length.
Yoke Increase Row (RS): *K to marker, M1L, sm, K1 (seam st), sm, M1R*; repeat from * to * to end of row.
Once armhole measures desired length, on a RS row, knit front panel sts to marker, rm, K1 (seam st), sm, (represents the center side seam), slip sleeve sts onto a st holder, rm, K1, rm, K back sts up to next marker, rm, K1, rm, sl 2nd sleeve sts onto another st holder, sm (center side seam), K1 rm, K to end. The seam sts are now part of your bodice. Turn and purl one row. (WS)
For Child Sizes: Continue working back and forth, increasing 4 sts on each RS row following the Bodice Increase until piece measures pattern or desired length less 2 1/2 inches.
For Adult Sizes: Work in stst for approximately 4 inches or desired length and at the same time shape the back. To Shape Back: Divide number of sts for back (between side seam markers) by 3. You may end up with an odd number of sts. Simply add the extra st(s) to the center of back. Example: 14, 15, 14. Work 1/3 of sts for back, pm, SSK. Work the next 1/3 less two sts, K2tog, pm. Decrease after & before markers on next 2-4 RS rows. Once garment measures 4 inches from underarm, increase on RS every 4th row using the Bodice Increase until piece measures pattern length or desired length less 2 1/2 inches.
Bodice Increase Row (RS): *K to marker, M1L, sm, M1R*; repeat from * to * to end of row.
Ozark Trim: Join in Ozark and work in stst for 2 inches, ending with a WS row.
Picot Bind Off: Join in MC or a contrasting color as an accent yarn. RS row: BO2, *slip st from right needle to left needle, CO 3 sts using cable cast on method, BO5; repeat * to end. BO last st.
Sleeves: Slip sleeve sts from holder onto needle. Work back and forth in stst until piece measures desired sleeve length less 2 1/2 inches. If working in the round, pick up 3 sts along underarm to eliminate the armhole opening.
For a narrow, dec 1 st at beginning and end of RS row or on either side of center seam st. Join in Ozark yarn and work in stst for 2 inches ending with a WS row. Join in MC or accent yarn, repeat Picot Bind Off as for body.
Right Side Button Band: Right side band is slightly wider than left side band. Using Ozark yarn and with RS facing, pick p and knit 1 st every other row along the front right panel starting at the hem. Work in stst for 2 inches or to desired width ready for a RS row.
Crochet Picot Bind Off: Working around the base of the button band, insert crochet hook and join in MC or accent yarn with sl st where Picot ends for hemline. *2 sc, che, sl st into 1st chain of ch3*, repeat from * to * to first st on left needle. at 1st st on needle, using hook, slip st knitwise off needle and work as part of a sc. Continue to work Picot Bind off, working 1 st at a time off the needle.
Left Side Button Band: Using Ozark, MC or contrasting color and with RS facing, pick up and knit 1 st every other row along the front left panel starting at the neckline edge. Work in stst for 2 inches or desired width ready for a RS row. Using MC or contrasting color, repeat the crochet Picot Bind off.
Finishing: Sew sleeve seams using mattress seam. Place buttons randomly down left button band and fasten.
With crochet hook, and beginning at the upper corner of the right button band, *2 sc, ch3, st st in 1st ch; repeat from * to end of neckline. Fasten off. If adding the full collar, work picot edging along the tops of the button bands.
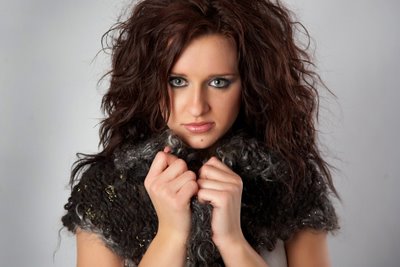
Optional Full Collar: With RS facing, pick up & K around neckline for collar. Work the loop sts row for approximately 6-8 rows or desired fullness. BO loosely with MC. Tack collar in place to even distribute the weight of the collar.
Loop Stitch Row: *K1, leaving stitch on left needle; bring yarn to front between needles; wrap around left thumb; move yarn to back between needles; knit the stitch again; slip stitch from left needle to right needle; lift 2nd stitch on right needle over last stitch worked as if to BO. Repeat from * across row.
Size --Coat ---CO --Front --Sleeve --Back ----MC ------Ozark ------Ozark
------Length ------& Back ------------------Approx. ---Approx. ----Add for
------inches -------Panel ------------------Yds/skein -Yds/skein --Full Collar
2t ----18 -----18 ----1 --------2 ------8 ----236/2 -------34/1 -------2
4t ----19 -----18 ----1 -------2 -------8 ----280/2 -------34/1 -------2
6 -----20 ----24 ----1 -------4 ------10 ----300/2 -------34/1 -------2
8 -----22 -----24 ---1 -------4 ------10 ----347/3 -------68/2 -------3
10 ---24 -----26 ----1 -------4 ------12 ----394/3 -------68/2 -------3
Adult Sizes
4 ----26 -----26 ----1 -------4 ------12 -----449/4 -------68/2 ------3
6 ----28 -----26 ----1 -------4 ------12 -----556/4 ------102/3 ------3
8 ----29 -----26 ----1 -------4 ------12 -----599/5 -----102/3 -------3
10 --30 ------26 ----1 ------4 -------12 -----662/5 -----102/3 ------3
12 ---31 -----28 ----1 ------4 -------14 -----678/5 -----102/3 -------3
14 ---32 -----28 ----1 ------4 -------14 -----727/6 -----136/4 -------3
16 ---33 -----28 ----1 ------4 -------14 -----786/6 -----136/4 -------3
18 ---34 -----28 ----1 ------4 -------14 -----815/6 -----136/4 -------3
20 --34 ------34 ----1 ------6 -------16 -----850/7 -----136/4 -------3
Select a size on the smaller side as this garment will stretch some.
These amounts are estimates only.
Allow additional yardage if enlarging pattern in any way.
Due to the nature & variance in color of Ozark Handspun yarns, it is strongly recommended to purchase enough skeins of the same yarn at the same time as each batch is truly unique and no two skeins are alike.
Due to the approximate yards of Ozark Handspun yarns of 34 yards, you may want to purchase an additional skein of yarn, just so you do not run short.
Labels: patterns, photos


